I discovered this recipe the year my little brother graduated from high school. I made it for his graduation party, and ever since it has been a summer staple. It works well as a side and is perfect for a lighter dinner. The ingredients are fresh and simple, which I love. When I make it for family gatherings, I can usually find my sister commandeering the entire bowl for herself!
Tortellini, Broccoli and Bacon Salad
2 bags (19 oz each) frozen cheese-filled tortellini
4 cups broccoli florets
2 cups cherry tomatoes, each cut in half
2 tablespoons chopped fresh chives
1 cup reduced-fat coleslaw dressing
1 lb. bacon, crisply cooked, crumbled
1/4 sunflower nuts
Cook and drain tortellini as directed on package. Rinse with cold water; drain.
In large (seriously large--maybe 4 qt. minimum) bowl, mix tortellini, broccoli, tomatoes, chives and dressing. Cover and refrigerate at least 1 hour to blend flavors.
Just before serving, stir in bacon. Sprinkle with nuts.
Thursday, April 29, 2010
Wednesday, April 28, 2010
Summer Food
The weather has been teasing us too much lately with the sun yo-yo-ing back and forth with the clouds and rain. But it has been getting much warmer, and with that comes the BBQ bug at our house. There's nothing I love more than what I call Summer Food. Well, except dessert. But if you don't count dessert, there's nothing better. So I think it's a great time to start pulling out some of my favorite dishes that are summer staples at our house. Here's the first one, borrowed from Food Network (a site I visit often):

Sue and Gloria's Baked Beans
Sue and Gloria's Baked Beans
Ingredients
- 4 (16-ounce) cans baked beans
- 1 (20-ounce) can crushed pineapple, drained
- 1 cup molasses
- 1 cup BBQ sauce
- 2 tablespoon yellow or brown mustard
- 5 slices cooked bacon, crumbled
- 1 (6-ounce) can french-fried onions, crushed
- Salt and freshly ground black pepper
Directions
Preheat oven to 350 degrees F.
In large bowl, mix together beans, pineapple, molasses, BBQ sauce, mustard, 1/4 of the bacon, and 1/4 of the onions. Add some salt and pepper, to taste. Pour beans in 9 by 13-inch casserole dish and sprinkle remaining crushed onions and bacon on top. Cook in oven for 1 hour or until beans brown and bubble. Serve warm.
Tuesday, April 27, 2010
Easy and Tasty
Cranberry Chicken
Ingredients:
4 to 6 boneless chicken breast halves, skin removed
1 can whole cranberry sauce
2/3 cup chili sauce
2 tablespoons cider vinegar
2 tablespoons brown sugar
1 package dry onion soup mix (like Lipton)
Preparation:
Place chicken breasts in the slow cooker. Combine remaining ingredients; add to the slow cooker, coating chicken well. Cover and cook on low 6 to 8 hours.
Serves 4 to 6.
Wednesday, April 21, 2010
Pour it On!
Yesterday I shared my homemade syrup recipe, so I thought it only prudent that I should share some of my favorite things to put it on!
Belgian Waffles
courtesy of Emeril Lagasse
2 cups cake flour
2 teaspoons baking powder
1/2 teaspoon salt
4 large eggs, separated
2 tablespoons sugar
1/2 teaspoon vanilla extract
4 tablespoons unsalted butter, melted
2 cups milk
non-stick cooking spray
Preheat the waffle iron according to the manufacturer's instructions. In 1 medium bowl sift together flour, baking powder, and salt. Set aside. In a second bowl use the wooden spoon to beat together the egg yolks and sugar until sugar is completely dissolved and eggs have turned a pale yellow. Add the vanilla extract, melted butter, and milk to the eggs and whisk to combine. Combine the egg-milk mixture with the flour mixture and whisk just until blended. Do not over mix. In third bowl, beat the egg whites with an electric mixer until soft peaks form, about 1 minute. Using the rubber spatula, gently fold the egg whites into the waffle batter. Do not overmix! Coat the waffle iron with non-stick cooking spray and pour enough batter in iron to just cover waffle grid. Close and cook as per manufacturer's instructions until golden brown, about 2 to 3 minutes. Serve immediately.
This recipe has a lot more steps than most, but it's all worth it, I promise! After making these an average of once a week for the last couple of years, I've easily found a rhythm when making these divine waffles. They cook up beautifully in my plain old boring waffle maker ...perfectly golden-brown with a little bit of a crispy bite. By the way, if you don't have cake flour, don't fret. You can make your own! For every 2 cups of cake flour required, use 1 3/4 cups flour + 1/4 cup cornstarch. Or you can just do what I do when I'm feeling lazy and just use a little less flour than the recipe calls for. Cake flour is light and delicate, so using less flour sort of makes sense, right? Well, at the very least, I'm happy with the results I get. You'll have to try it out for yourself.
I am often asked what the secret is for my pancakes. Well not much, really. Yes, they are pretty yummy, but I will sheepishly admit that what I do to make my pancakes is nothing too original: I use Bisquick. On the back of the Bisquick box are the directions for making pancakes, with two other options below the original recipe. What did I do? I combined the 3 recipes one morning and I loved the results! Here it is:
Hearty Pancakes
2 cups Bisquick
1 cup milk
2 eggs
2 tablespoons sugar
1 tablespoon lemon juice
2 teaspoons baking powder
1 teaspoon vanilla
Heat griddle or skillet over medium-high heat or electric griddle to 350 degrees; grease with cooking spray, vegetable oil or shortening. (Surface is ready when a few drops of water sprinkled on it dance and disappear.)
Stir all ingredients until blended. Pour by slightly less than 1/4 cupfuls onto hot griddle. Cook until edges are dry. Turn; cook until golden.
French Toast
18-20 slices of bread (I love to use my homemade Honey-Whole Wheat bread)
2 cups milk
3 eggs
1/4 teaspoon cinnamon
1/4 teaspoon nutmeg
1/4 teaspoon vanilla
Combine eggs, milk, cinnamon, nutmeg and vanilla in a shallow bowl; mix well.
Dip each slice of bread into the milk mixture, coating both sides well. Cook on a nice hot griddle (about 350 degrees) for about 2-3 minutes. Flip ‘em over and cook them for another 2 minutes or until golden brown.
Tuesday, April 20, 2010
Homemade Syrup
When I was a kid my family ate lots of pancakes, waffles and french toast. With five kids in the family, we went through a LOT of syrup. I believe my mother was very wise, as she always made her own syrup and probably saved a ton of money by doing so. Ever since, I've always preferred homemade syrup, unless I have the money to fork out for a jar of the real thing (like the kind made from maple trees in Vermont). Since I usually can't muster the courage to empty my wallet on a 12oz. jar of genuine maple syrup, I resolved to make my own just as my mother did and still does. The pros: I can determine the amount of sugar, the thickness, the flavor and the cost. The cons: it's not the real deal. Try it out:
Homemade Maple Syrup
1 cup water
1 cup corn syrup
1 1/2-2 cups sugar
1/2 tsp. Mapleine imitation maple (I prefer this brand, but it can be substituted with any imitation maple)
1/2 tsp. butter extract (optional)
In a large saucepan, combine water, corn syrup and sugar over medium-high heat. Stir often; bring to a boil. While stirring, allow mixture to boil for about another 30 seconds. Remove from heat. Stir in Mapleine and butter extract if desired. Mix well and let cool.
The syrup will thicken as it cools. If you want thicker syrup, you can boil it a little longer or increase the amount of corn syrup.
Homemade Maple Syrup
1 cup water
1 cup corn syrup
1 1/2-2 cups sugar
1/2 tsp. Mapleine imitation maple
1/2 tsp. butter extract (optional)
In a large saucepan, combine water, corn syrup and sugar over medium-high heat. Stir often; bring to a boil. While stirring, allow mixture to boil for about another 30 seconds. Remove from heat. Stir in Mapleine and butter extract if desired. Mix well and let cool.
The syrup will thicken as it cools. If you want thicker syrup, you can boil it a little longer or increase the amount of corn syrup.
Saturday, April 17, 2010
What's for Dinner?
Every Sunday we have dinner with our cousins. EVERY Sunday. We take turns hosting and cooking, and it's turned into one of the best traditions we've ever created. This is one of the things I love about food. There are always such great memories that go hand-in-hand with good food.
Inside the Sunday dinner tradition lies another, albeit rather inconsistent: maintaining the element of surprise. We tend to tease and torture each other by withholding the answer to the most important question: What's for dinner?
Well, as the hostess and cook of tomorrow night's meal, I have finally chosen. And since I know for a fact that our cousins are not among my readers, I thought I'd share this delicious meal with you.
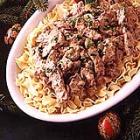
RED RIVER BEEF STROGANOFF
2 lbs. sirloin steak, cut into thin strips
1/4 cup all-purpose flour
1/2 cup butter or margarine, divided
2 large onions, chopped
1 can (10 1/2 ounces) beef broth
1 teaspoon dried basil
Salt and Pepper to taste
1 jar (4 1/2 ounces) sliced mushrooms, drained
1 tablespoon Worcestershire sauce
1 cup (8 ounces) sour cream
Cooked rice or noodles
Dredge meat in flour. In a skillet, melt 1/4 cup butter over medium heat; saute onions until tender. Remove and set aside. Melt remaining butter and brown meat on all sides. Add broth, basil, salt and pepper, mushrooms, Worcestershire sauce and onions. Cook until mixture thickens, about 5 minutes.
Just before serving, stir in sour cream. Heat through, but do not boil. Serve over rice or noodles.
Yield: 8 servings
It seems like I always have something to add after every recipe. Sorry. My only comment here is to exchange the steak for a couple of pounds of ground beef or turkey if the steak seems a little too pricey. It's good either way!
Inside the Sunday dinner tradition lies another, albeit rather inconsistent: maintaining the element of surprise. We tend to tease and torture each other by withholding the answer to the most important question: What's for dinner?
Well, as the hostess and cook of tomorrow night's meal, I have finally chosen. And since I know for a fact that our cousins are not among my readers, I thought I'd share this delicious meal with you.
RED RIVER BEEF STROGANOFF
2 lbs. sirloin steak, cut into thin strips
1/4 cup all-purpose flour
1/2 cup butter or margarine, divided
2 large onions, chopped
1 can (10 1/2 ounces) beef broth
1 teaspoon dried basil
Salt and Pepper to taste
1 jar (4 1/2 ounces) sliced mushrooms, drained
1 tablespoon Worcestershire sauce
1 cup (8 ounces) sour cream
Cooked rice or noodles
Dredge meat in flour. In a skillet, melt 1/4 cup butter over medium heat; saute onions until tender. Remove and set aside. Melt remaining butter and brown meat on all sides. Add broth, basil, salt and pepper, mushrooms, Worcestershire sauce and onions. Cook until mixture thickens, about 5 minutes.
Just before serving, stir in sour cream. Heat through, but do not boil. Serve over rice or noodles.
Yield: 8 servings
It seems like I always have something to add after every recipe. Sorry. My only comment here is to exchange the steak for a couple of pounds of ground beef or turkey if the steak seems a little too pricey. It's good either way!
Friday, April 16, 2010
Thank you, Mr. McCargo
These tasty appetizers are our traditional fare for large gatherings focused around sports (they qualify as “Man Food”). They are tiny bundles of joy that some of the toughest critics have not been able to resist. They are a crowd favorite at our house.
One last note: Yes, it says Blue Cheese Dip. Even if you’ve declared yourself a non-blue cheese eater, don’t discount this dip until you’ve tried it…meaning that you actually make it and then dip the BCC balls in it and take a bite. If you still don’t like it? Well, you’ve built some character by surviving the journey with your taste-buds.

Pick the meat from the chicken and discard the skin. Place the chicken in a large bowl and add the hot sauce, pepper, cheese, and scallions, and toss to combine. Roll the chicken into 2-ounce balls, about the size of a golf ball.
Place the flour, eggs, and bread crumbs in 3 separate bowls. Roll each ball in the flour, then the egg and then the bread crumbs. Set aside.
When the oil is hot fry the chicken balls in batches. Cook for about 2 minutes per batch. Remove the chicken to paper towel lined plate to drain the excess oil.
To make the sauce, combine all ingredients in a large bowl and adjust the seasoning if necessary. Serve the chicken alongside the dipping sauce.
One last note: Yes, it says Blue Cheese Dip. Even if you’ve declared yourself a non-blue cheese eater, don’t discount this dip until you’ve tried it…meaning that you actually make it and then dip the BCC balls in it and take a bite. If you still don’t like it? Well, you’ve built some character by surviving the journey with your taste-buds.
Buffalo Chicken Cheese Balls
Recipe courtesy Aaron McCargo Jr.- Prep Time: 20 min
- Inactive Prep Time: --
- Cook Time: 10 min
- Level: Easy
- Serves: 15 to 20 balls
Ingredients
- 1 store-bought rotisserie chicken
- 1/4 cup hot sauce (recommended: Frank's Red Hot)
- 1 teaspoon ground black pepper
- 1 3/4 cups sharp Cheddar
- 1/4 cup freshly sliced scallions
- 1 cups all-purpose flour
- 3 eggs, lightly beaten
- 2 cups panko bread crumbs
- Vegetable oil, for frying
Blue Cheese Dip:
- 1 1/2 cups mayonnaise
- 1/2 cup packed blue cheese, broken up
- 1/2 teaspoon hot sauce
- 2 teaspoons Worcestershire sauce
- 1 teaspoon salt
- 1/2 lemon, juiced
- 1 teaspoon chopped garlic
Directions
Have oil heated to 350 degrees F.Pick the meat from the chicken and discard the skin. Place the chicken in a large bowl and add the hot sauce, pepper, cheese, and scallions, and toss to combine. Roll the chicken into 2-ounce balls, about the size of a golf ball.
Place the flour, eggs, and bread crumbs in 3 separate bowls. Roll each ball in the flour, then the egg and then the bread crumbs. Set aside.
When the oil is hot fry the chicken balls in batches. Cook for about 2 minutes per batch. Remove the chicken to paper towel lined plate to drain the excess oil.
To make the sauce, combine all ingredients in a large bowl and adjust the seasoning if necessary. Serve the chicken alongside the dipping sauce.
Thursday, April 15, 2010
Deliberation, n.: The act of examining one's bread to determine which side it is buttered on.
We love bread at our house. My family and I gobble up rolls, biscuits, cinnamon rolls, etc. as fast as they come out of the oven. My favorite is homemade bread; nothing beats a warm slice slathered with butter. In fact, every time I finish making a batch of bread it has become tradition to break into one of the loaves as soon as it has cooled off enough to cut it. I just can't resist. Mmmmmm....
Here's the recipe for my favorite homemade bread:
Honey-Whole Wheat Bread
2 pkgs. regular active dry yeast (1 pkg. = 2 1/4 tsp.)
1/4 cup warm water (105-115 degrees F)
1/2 cup honey
1/4 cup butter or margarine
3 teaspoons salt
2 1/2 cups hot water (120-130 degrees F)
4 1/2 cups whole wheat flour
2 3/4 to 3 3/4 cups all-purpose flour
In small bowl, dissolve yeast in warm water; set aside. In large bowl, mix honey, butter, salt and hot water; cool 5 minutes.
To cooled honey mixture, beat in 3 cups of the whole wheat flour with electric mixer on low speed, scraping bowl frequently, until moistened. Beat on medium speed 3 minutes, scraping bowl frequently. Beat in remaining 1 1/2 cups whole wheat flour and dissolved yeast. Add 2 1/4 to 2 3/4 cups of the all-purpose flour until dough pulls cleanly away from side of bowl.
Place dough on floured work surface. Knead in remaining 1/2 to 1 cup all-purpose flour; continue kneading 5 to 10 minutes until dough is smooth and springy (I often use my KitchenAid mixer to do the kneading for me, which is so much easier). Grease large bowl with shortening or cooking spray; place dough in bowl, turning dough to grease all sides. Cover loosely with plastic wrap or cloth towel. Let rise in warm place (80-85 degrees F) 30 to 45 minutes or until doubled in size.
Generously grease 2 loaf pans with shortening or cooking spray. Gently push fist into dough to deflate; divide in half. On lightly floured surface, roll each half of dough with rolling pin into 18x8-inch rectangle. Starting with one 8-inch side, roll up dough tightly, pressing with thumbs to seal after each turn. Pinch edge of dough into roll to seal; pinch each end to seal. Fold ends under loaf; place seam side down in pan. Cover; let rise in warm place 30-45 minutes or until doubled in size.
Heat oven to 375 degrees. Uncover dough; bake 30 minutes. Reduce oven temperature to 350 degrees; bake 10-15 minutes longer or until loaves sound hollow when lightly tapped. Immediately remove from pans to cooling racks. Cool completely, about 1 hour (if you have the self-control to resist cutting into it).
My tips for baking bread:
On days when my house or kitchen isn't warm enough to allow the dough to rise well, I incubate it in my oven! I turn on the oven to 175-200 degrees for a couple minutes and then turn it off before placing the bowl of dough inside. It works like a charm!
I also like to butter the tops of the loaves as soon as I pull them out of the oven. It makes the crust softer and gives it that yummy buttery taste!
I leave you with a bonus:
Yummy Rolls
1 cup hot water (105-115 degrees)
1 cup melted butter
3/8 cup sugar
1 tablespoon yeast
1 egg
3 1/2 cups flour
1/2 teaspoon salt
1/2 teaspoon baking powder
Combine hot water, butter, sugar and yeast in a large bowl; mix well. Cover and let rise 10 minutes.
Add egg, 1 1/2 cups flour, salt and baking powder; mix well. Add remaining flour; mix well, scraping sides of bowl. Cover and let rise in warm place 55 minutes or until doubled in size.
Place dough on floured surface and knead a few times. From here, you may create any type of roll you desire. Just roll out the dough and cut.
Bake in 400 degree oven about 10-15 minutes, depending on the type of roll. How do you know when they're done? Lightly press the top of a roll; if it springs back, it's done. If a little indentation remains, bake a little longer.
These are super yummy! I received this recipe from a friend of mine in Utah. It's such an easy dough to make and is really versatile. I have even used this recipe to make a couple loaves of bread before. If you're a church-goer like me, you can easily make the dough and put it in the fridge before you leave. When you come back a few hours later, it will have risen and all you have to do is roll it out. If you want your rolls a little larger, you can also let them rise a second time after the rolls have been formed and placed on a baking sheet.
Don't Have Self-Rising Flour?
No need to jump in the car and race to the store. If your recipe calls for self-rising flour, here's how you can adapt:
For each cup of all-purpose flour, add 1 1/2 teaspoons of baking powder and 1/2 teaspoon of salt. Mix to combine.
Super easy!
Wednesday, April 14, 2010
What I'm Making Now
These are two of my favorite recipes. I love pork tenderloin, so when it goes on sale, this is one of the ways I make it. The biscuits that follow are delicious! I love sweet potatoes and I love biscuits--a perfect combination!
Honey Spice-Rubbed Pork Tenderloin
1 pork tenderloin (1 lb.)
1/4 cup Catalina dressing, divided
1 tsp. chili powder
1 tsp. garlic powder
1 tsp. dry mustard
1/2 tsp. paprika
1/4 tsp. dried thyme leaves
1 Tbsp. honey
Preheat oven to 425 degrees. Brush meat with 2 Tbsp. of the dressing. Mix dry ingredients; rub onto meat. Place in baking pan. Mix remaining 2 Tbsp. dressing and honey; set aside.
Bake 15 minutes; brush with dressing mixture. Bake an additional 10 minutes or until cooked through (160 degrees).
Remove meat from oven; cover with foil. Let stand 5 minutes before slicing.
Makes 4 servings
Recipe courtesy of Kraft Foods
Sweet Potato Biscuits
2 cups self-rising flour
1/4 cup packed brown sugar
1 tsp. ground cinnamon
1 tsp. ground ginger
7 tablespoons cold butter, divided
3 tablespoons shortening
1 cup mashed sweet potatoes
6 tablespoons milk
In a large bowl, combine the flour, brown sugar, cinnamon and ginger. Cut in 4 tablespoons butter and shortening until mixture resembles coarse crumbs.
In a small bowl, combine sweet potatoes and milk; stir into crumb mixture just until moistened. Turn onto a lightly floured surface; knead 8-10 times.
Pat or roll out to 1/2-inch thickness; cut with a floured 2-1/2-inch biscuit cutter. Place 2 inches apart on ungreased baking sheets.
Melt remaining butter; brush over dough. Bake at 425 degrees for 10-12 minutes or until golden brown. Remove from pans to wire racks. Serve warm. Yield: 1-1/2 dozen
Recipe courtesy of Taste of Home
Welcome to My Kitchen
I love everything about food: color, texture, smell, taste and the ability it has to bring people together. I also love to cook, and have had the fortune of finding people who enjoy what I make. One of those people is in my family, and after several requests from her I have finally decided to share the food I love on a blog.
Now, just a warning: I am not a chef. I am not a culinary genius. So if you are looking for elaborate, gourmet food this is probably not the place you want to be! While I enjoy throwing a few gourmet meals into the mix, I usually keep things simple. On occasion I create my own recipes, but I generally stick to recipes and then add my own little twist if I feel so inclined.
In short, this is just a place for me to share my favorite foods with anyone who might be interested. I hope you find something you'll enjoy and let me know how it turns out!
Subscribe to:
Posts (Atom)